How to Change Time Format in Windows
Written by Pavan Kumar on April 7, 2009
Many of the visitors here use Windows Operating System. The most common observation is that people use the same installation done by their dealer for years without even restoring the backup they have been provided. Its better for users to reinstall Windows after some time as there may be some performance changes during the period of time due to repeated installation and removal of third party softwares.
 Usually the time format after a fresh Windows installation will be in 24 hour format which is most undesirable for many of the users. You can change time format from default 24 hours to 12 hour format just within few seconds. Here is how one can achieve that.
Open Control Panel > Regional and Language Options

Now, click Customize this format button. You will be shown up with customization window, goto time tab.
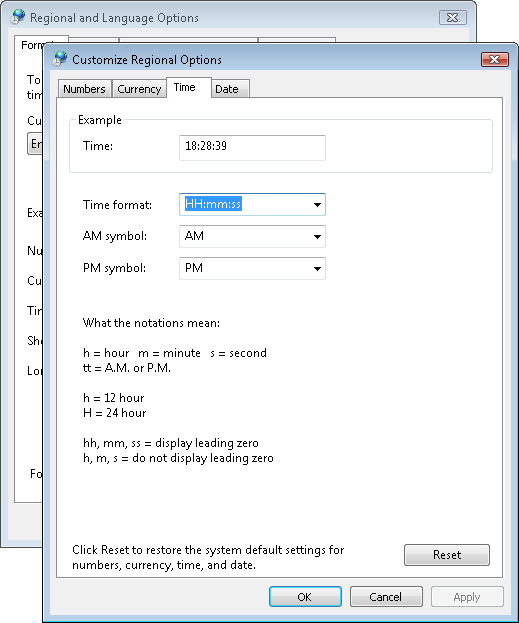
The default 24 hour format will be displayed as HH:mm:ss. If you want to change time format, you need to change the way as you wish depending on the instructions / notations given in the image. In simple words, if you want to have your new time format to be of 12 hour type, modify the default HH:mm:ss to hh:mm:ss. Now you will see the changes come into effect after you click Apply / OK. The same procedure works fine with Windows XP or Windows Vista.
People who liked this also read:


I guess very few people change Time Format in Windows!!
Default format is pretty good I guess!!